Check out these step-by-step instructions on each section of the MobileServe Dashboard. We also have video tutorials here.
Dashboard Home
Organization Overview
The Organization Overview is your Dashboard home and provides a quick glance at your organization. If you have any sub-organizations, they’ll be listed at the bottom of this page.

Tips:
- Filter the data by date in the top right corner.
- Hover over a Service Category to see total number of hours for that category
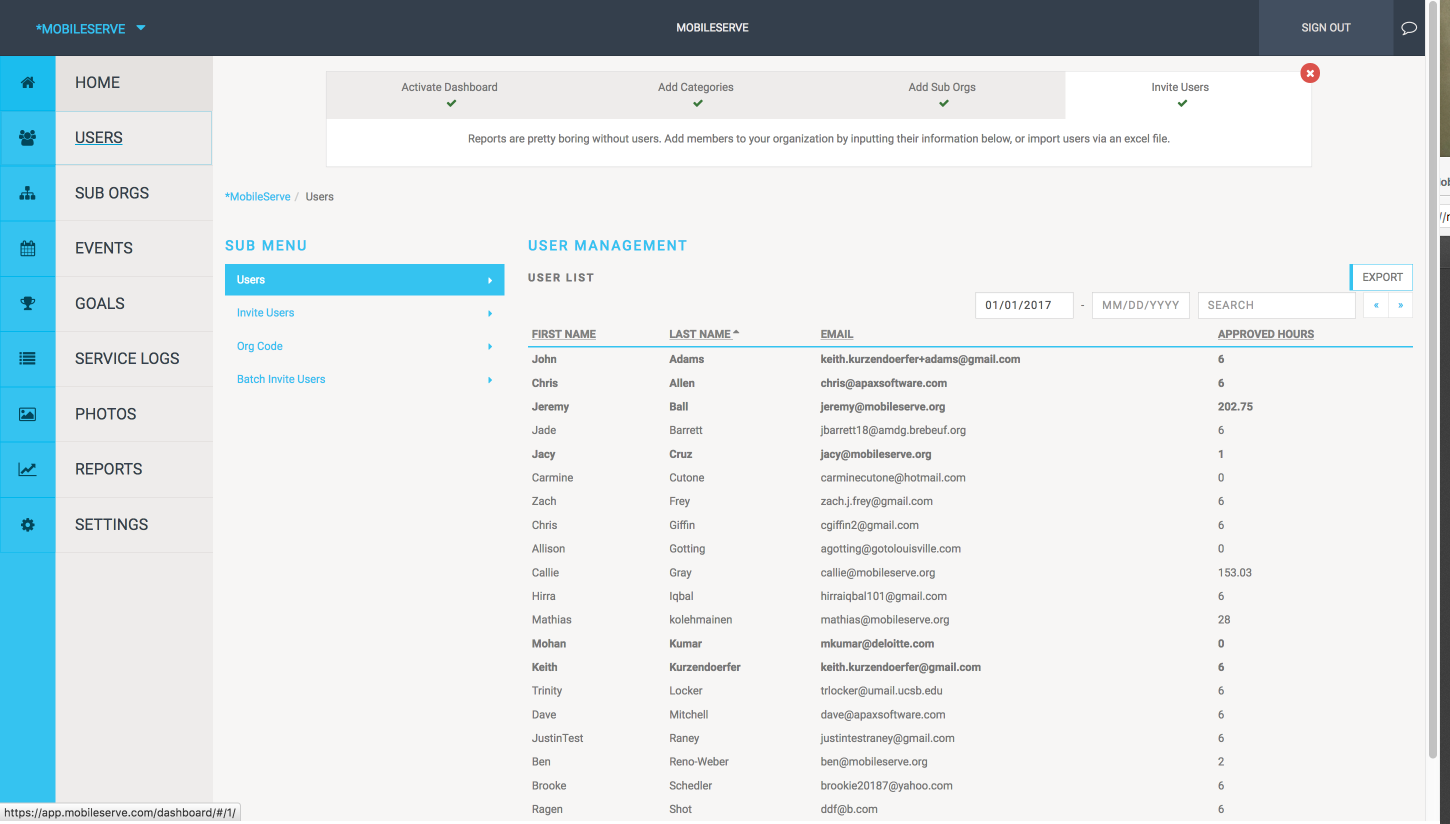
Users
In the Users section, you can invite and manage users. The User Management page shows basic contact information as well as total approved service hours each user has contributed within the designated date range.
Invite Members
You have 3 options to invite users: enter addresses, upload a list, or email them directly. It's important to keep in mind that users will be invited to the level of your organization you are currently on. To invite users into a specific Sub Org, be sure you first navigate to the Sub Org level they should belong to, then follow the instructions below.
To Invite Users By Entering Email Addresses
This option is best if you don’t have a lot of email addresses or for one-off invites.
- In Users, go to Invite Users.
- Enter the user’s email address. If entering multiple email addresses, separate with a comma.
- Check the Admin box if the new user(s) should be an administrator of the organization.
- Select Send Invites. When the user creates an account through the link in the email, he or she will automatically be linked to your organization.
To Invite Users via List Upload
This option is best if you’re inviting several new users.
- Email us a spreadsheet with the email address of each user and the sub-org name they should belong to.
- The users will receive an email invitation directly from MobileServe. When they create an account through the link in the email, they will automatically be linked to your organization.
To Invite Users Directly
You can bypass the in-app invitations, and simply provide your org code to your users. This option is best if you want to personalize the email or if you think people may delete (or not read) an email that comes directly from MobileServe. They can create MobileServe accounts and add the code during signup or at any point in their Settings. From your Sub Orgs page click "Download Getting Started Guide" to download a PDF with instructions for signing up along with the codes for each of your Sub Orgs.
View Member Details
-
On the Users page, slick on the name of a user to go to their profile page, which lists all service logs. On the profile page, select “View” to see details of the specific log.
-
You can also export a list of all Users and their hours, including a breakdown of pending, approved, and total hours by service category. Click "Export" and select a file type. The export will only include hours within the date range you have selected.

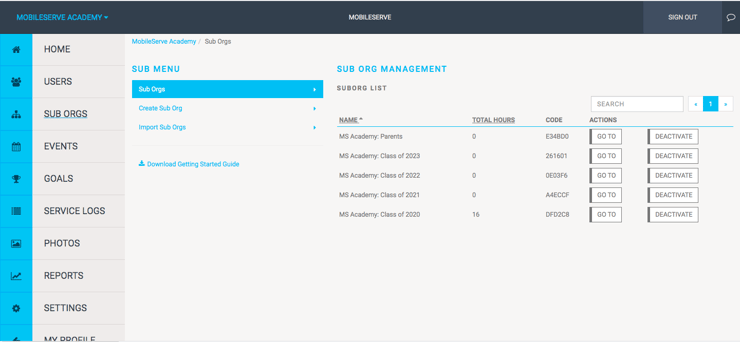
Sub Orgs
In the Sub Orgs section of your Dashboard, you can create and view sub-organizations. The default page shows a list of your existing sub orgs and their total hours. Clicking “Go To” next to a name will take you to that sub org’s Dashboard. You can also view all the Codes for each Sub Org and "Download a Getting Started Guide" from this page, which you can share with your users to walk them through the sign-up process.
You can also Deactivate Sub Orgs from this page. Deactivating a Sub Org will remove all it's users from MobileServe. They will no longer take up seats or count toward your total users. They will continue to have access to their MobileServe accounts and you will be able to access their logs via the Service Logs page, but not from the Users page.
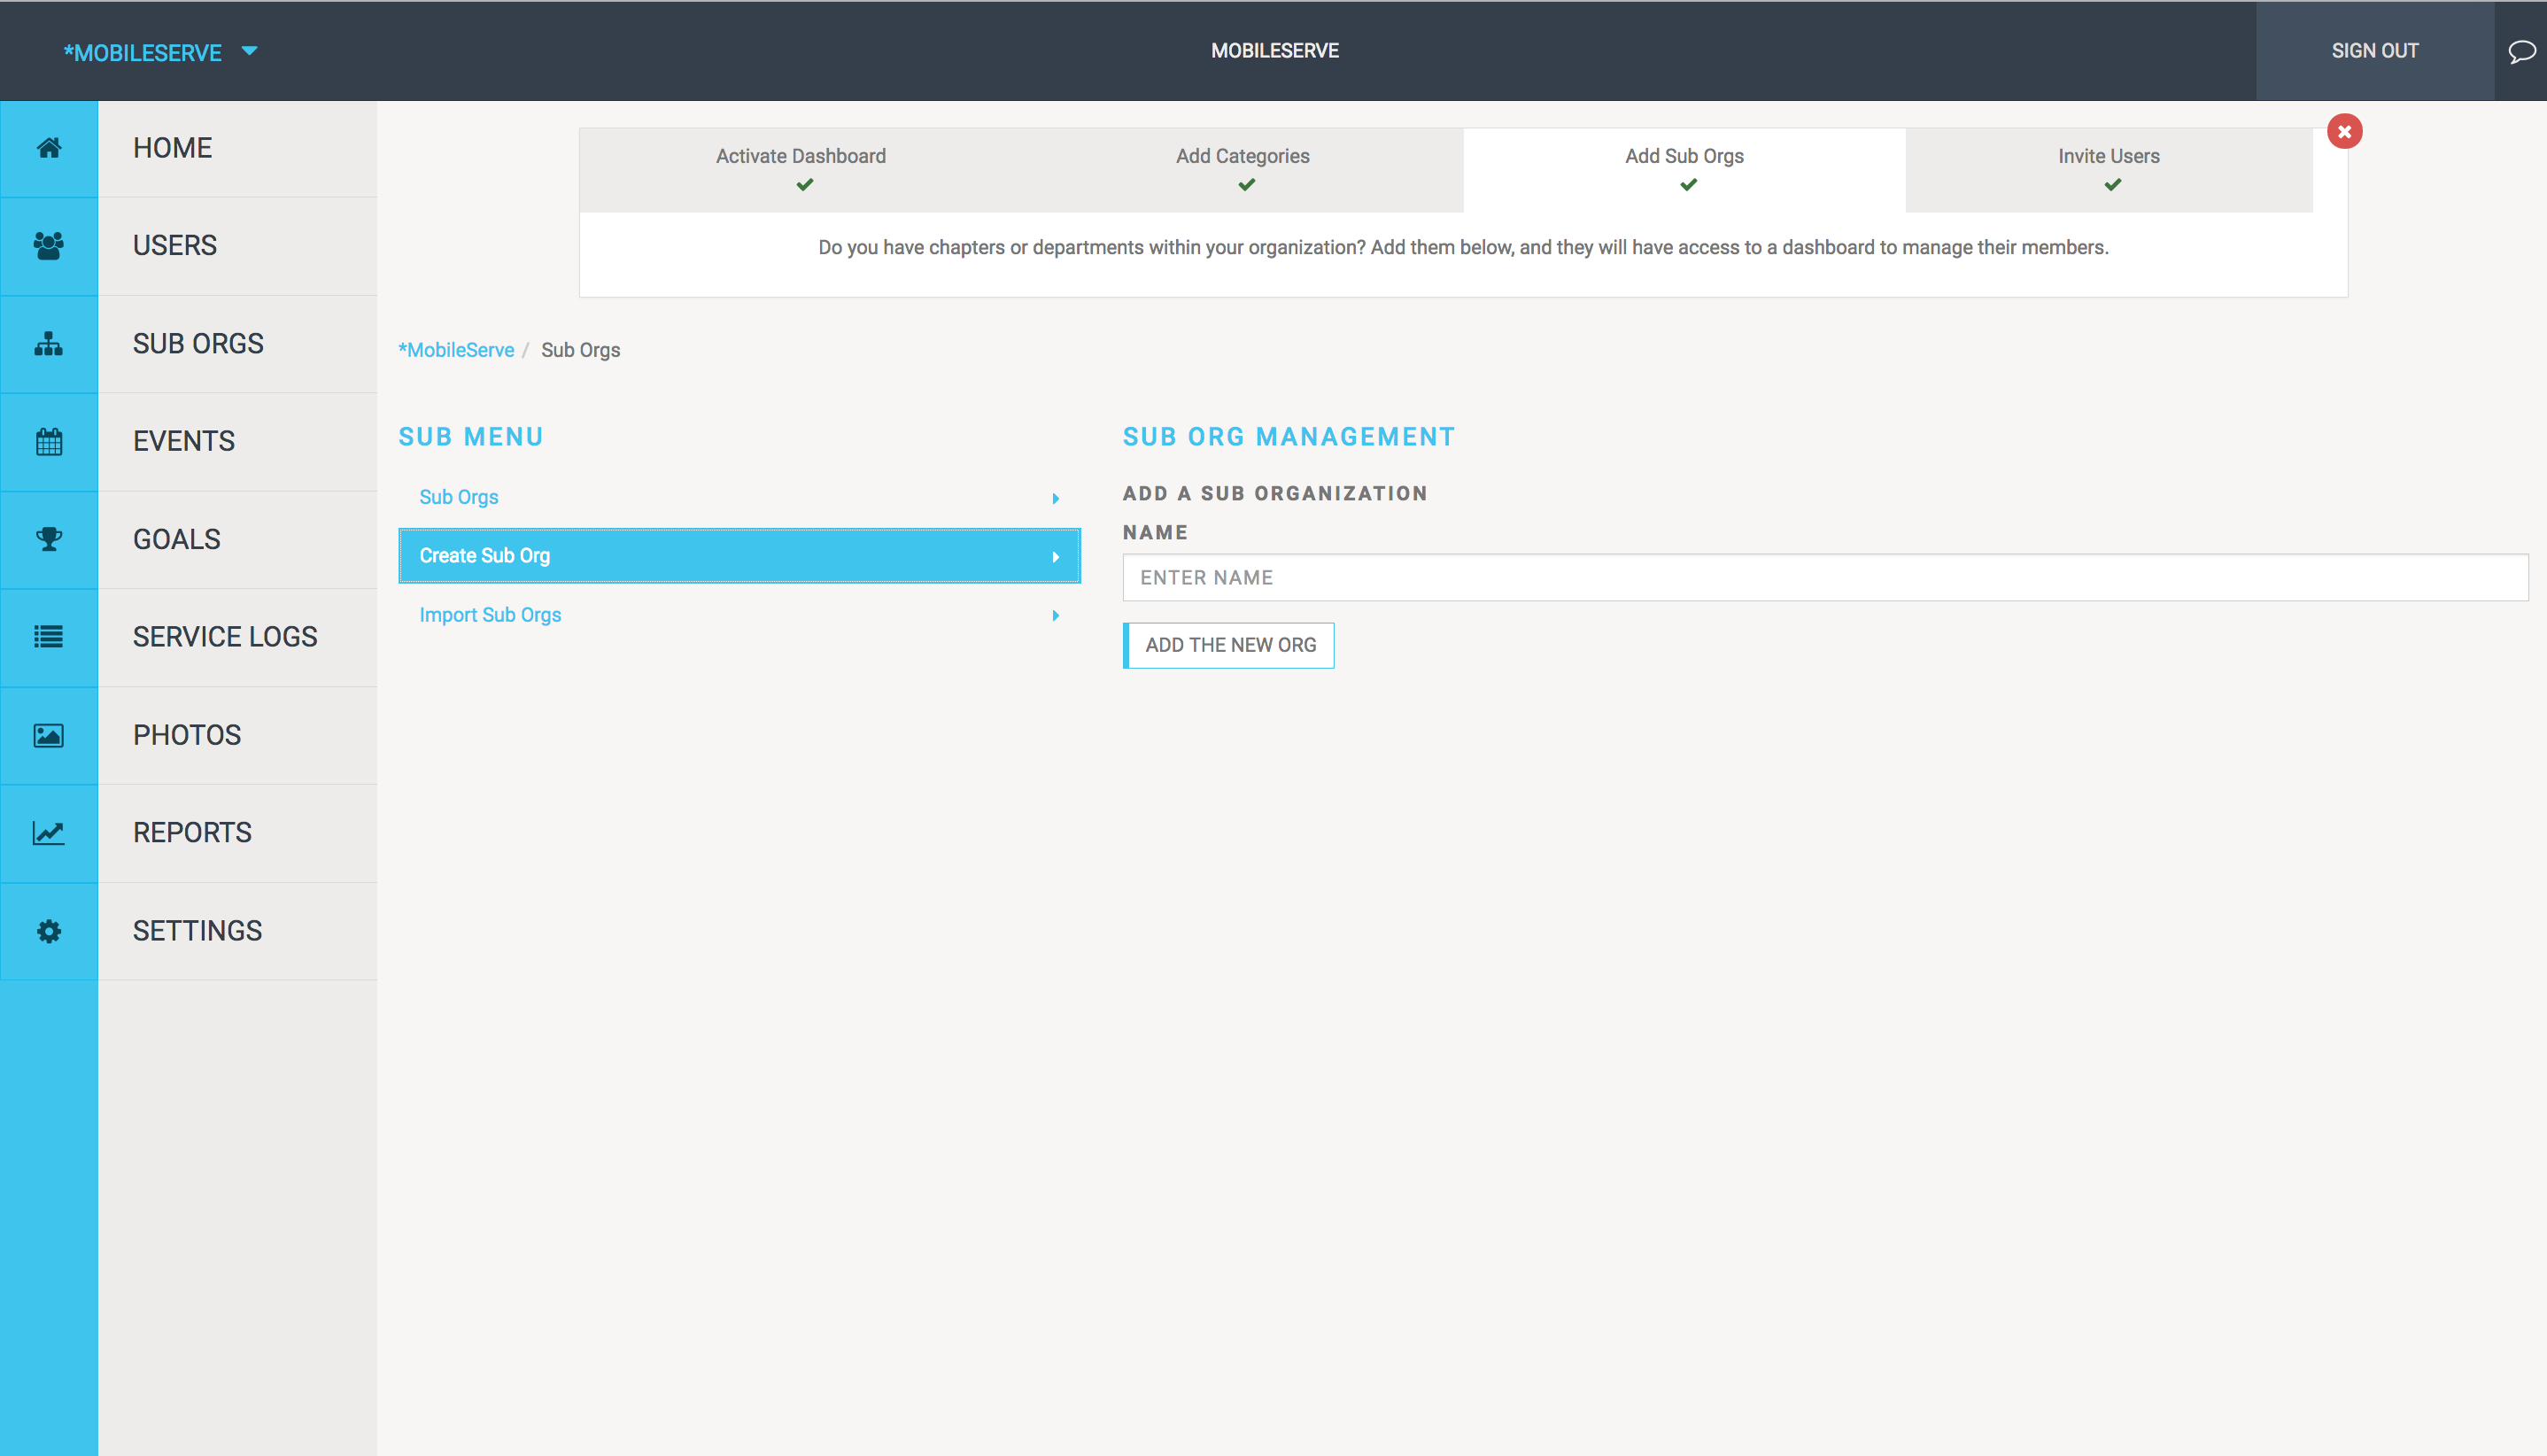
Create a New Sub Org
- From the Sub Orgs page, select “Create Sub Org” and enter the name.
- Once created, the name will appear on the main Sub Org page. You can manage the sub org (e.g. invite users, view the sub org’s code, etc.) by going to its Dashboard. Keep in mind that Sub Org names must be unique across all of MobileServe, so if a name is already taken, try using a prefix that is related to your organization before the name of the Sub Org.
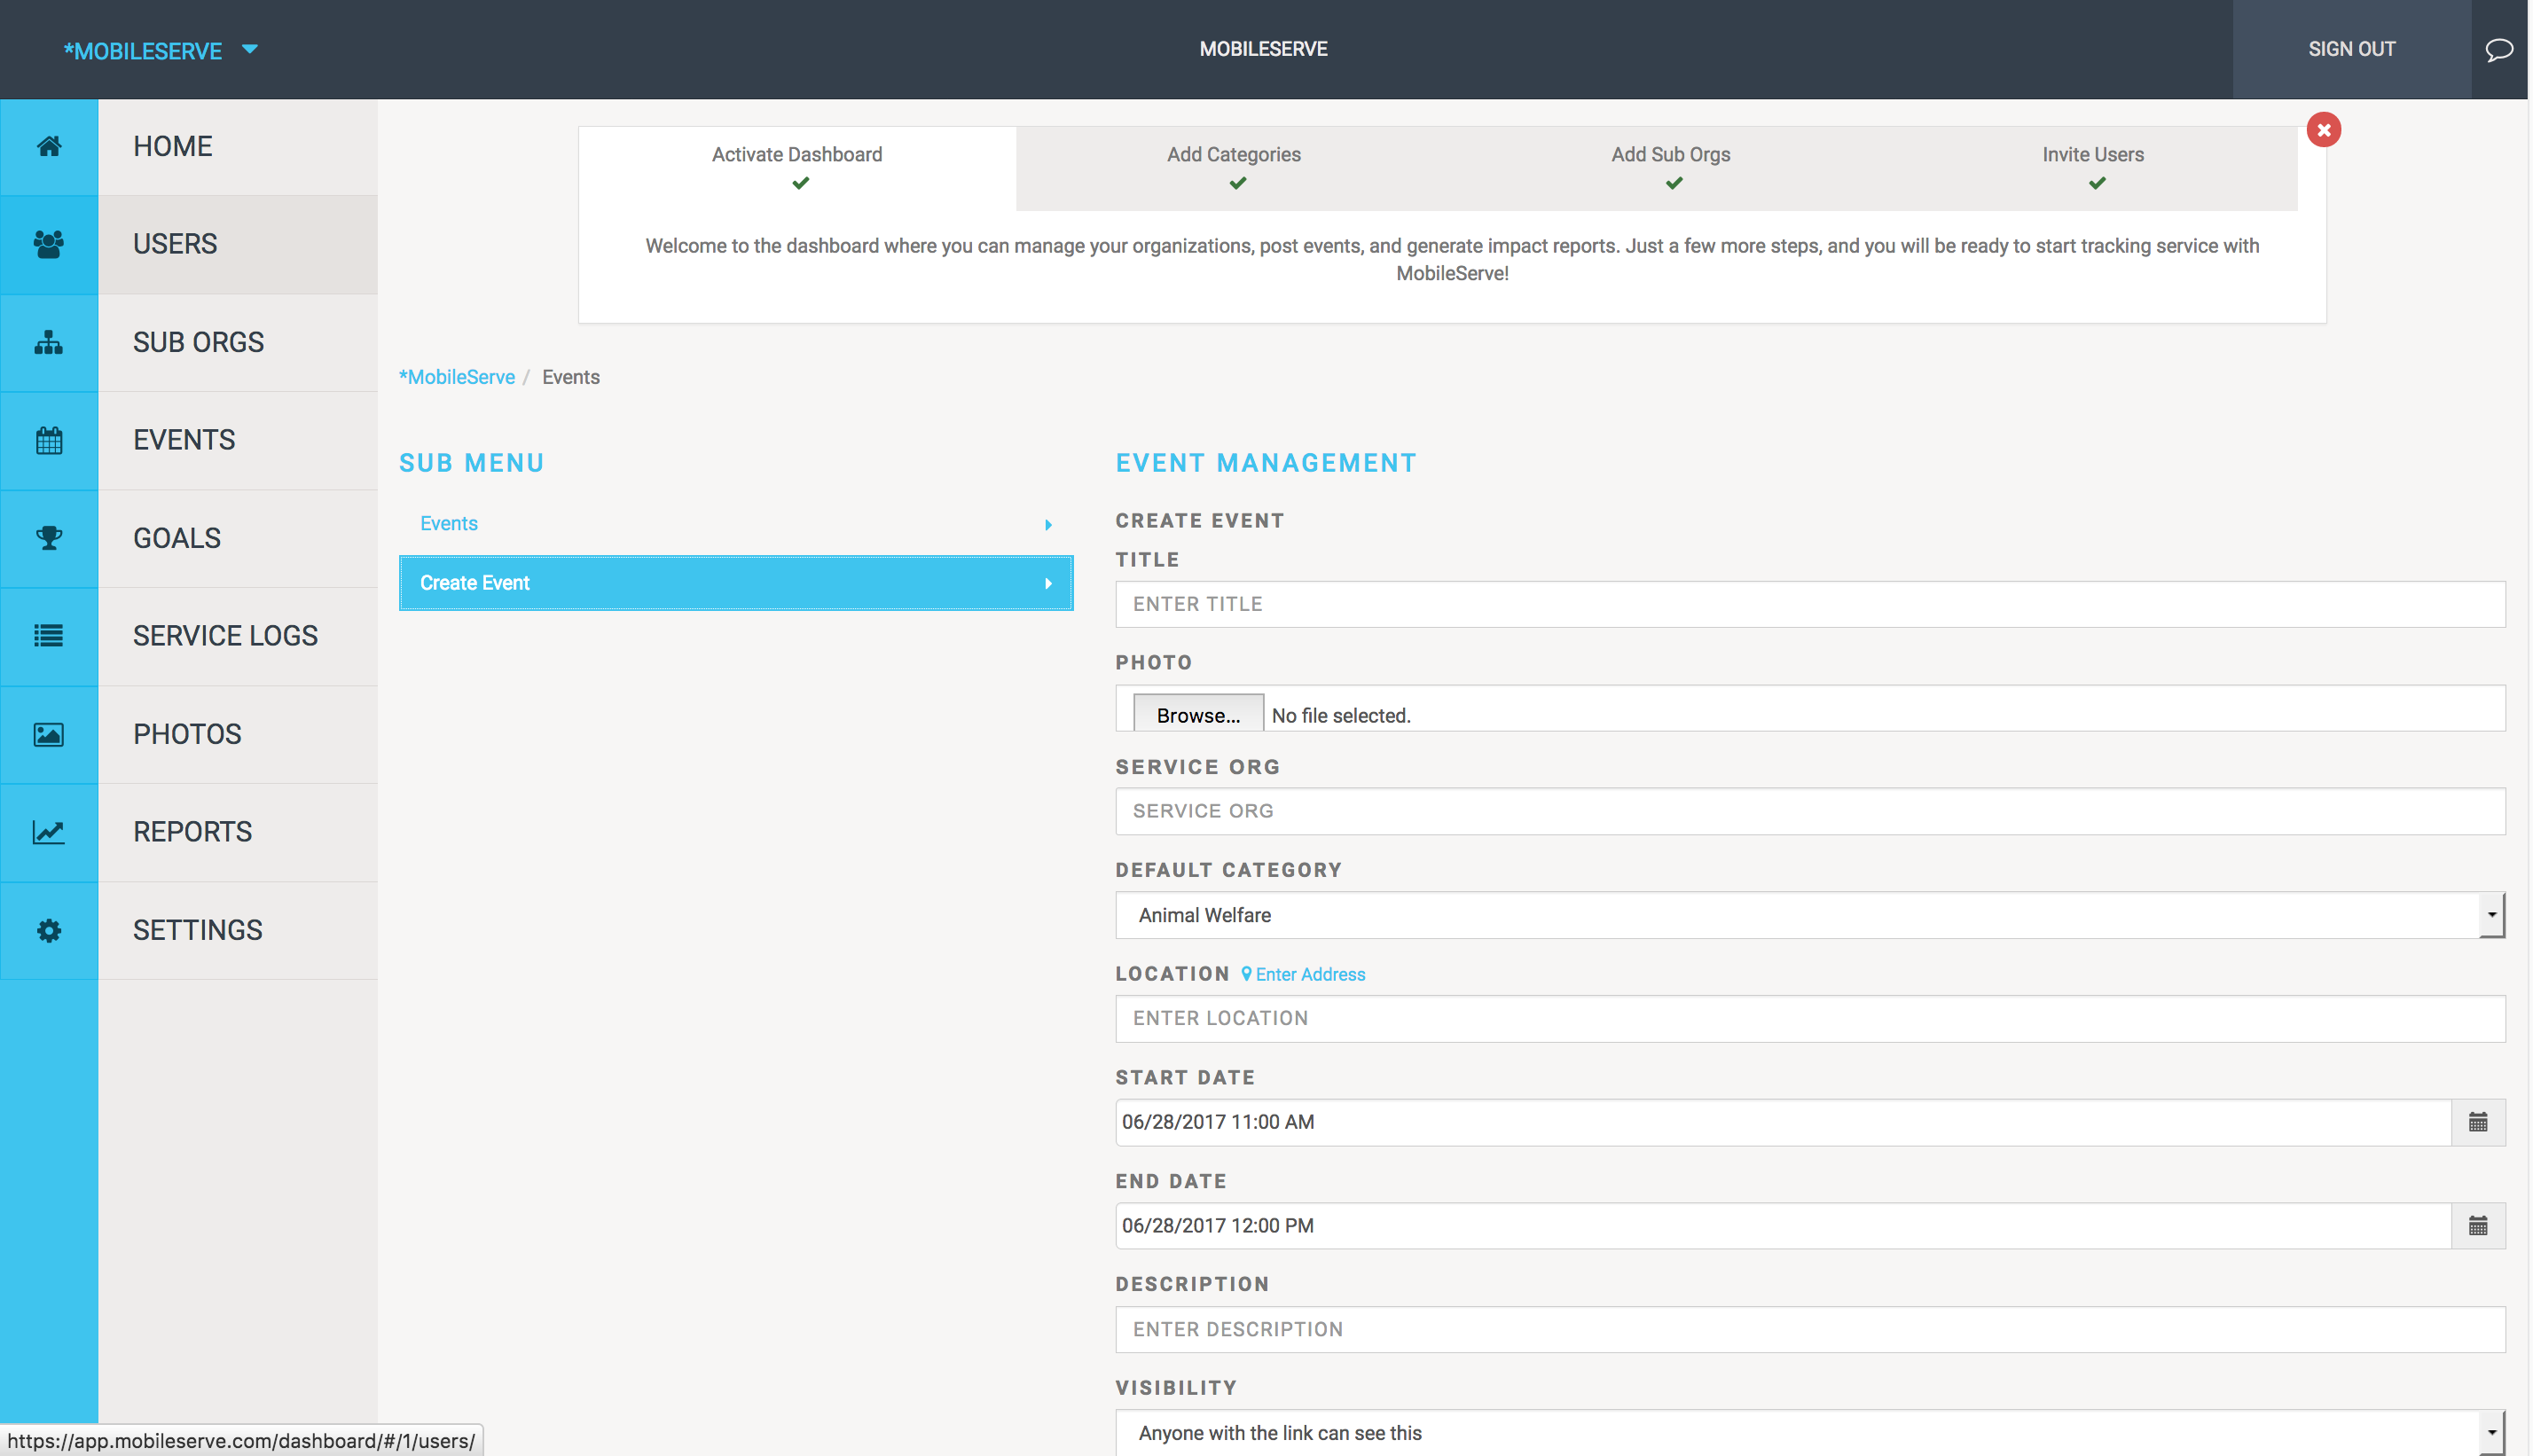
Create an Event
The Events tab allows your organization and each sub-org to invite users to a service project or to create multiple service opportunities throughout the year. From the Events tab in the lefthand menu:
- Select “Create Event”
- Enter the event details, including:
- Title
- Photo - this is optional. If you add a photo, it will be included in the email invitation.
- Service Organization - this is also optional.
- Default Service Category, which is how you attendees’ logs will be categorized.
- Address of the event - optional
- Date & Time
- Description, which is optional
- and Visibility
- Click Continue, to go to the next screen
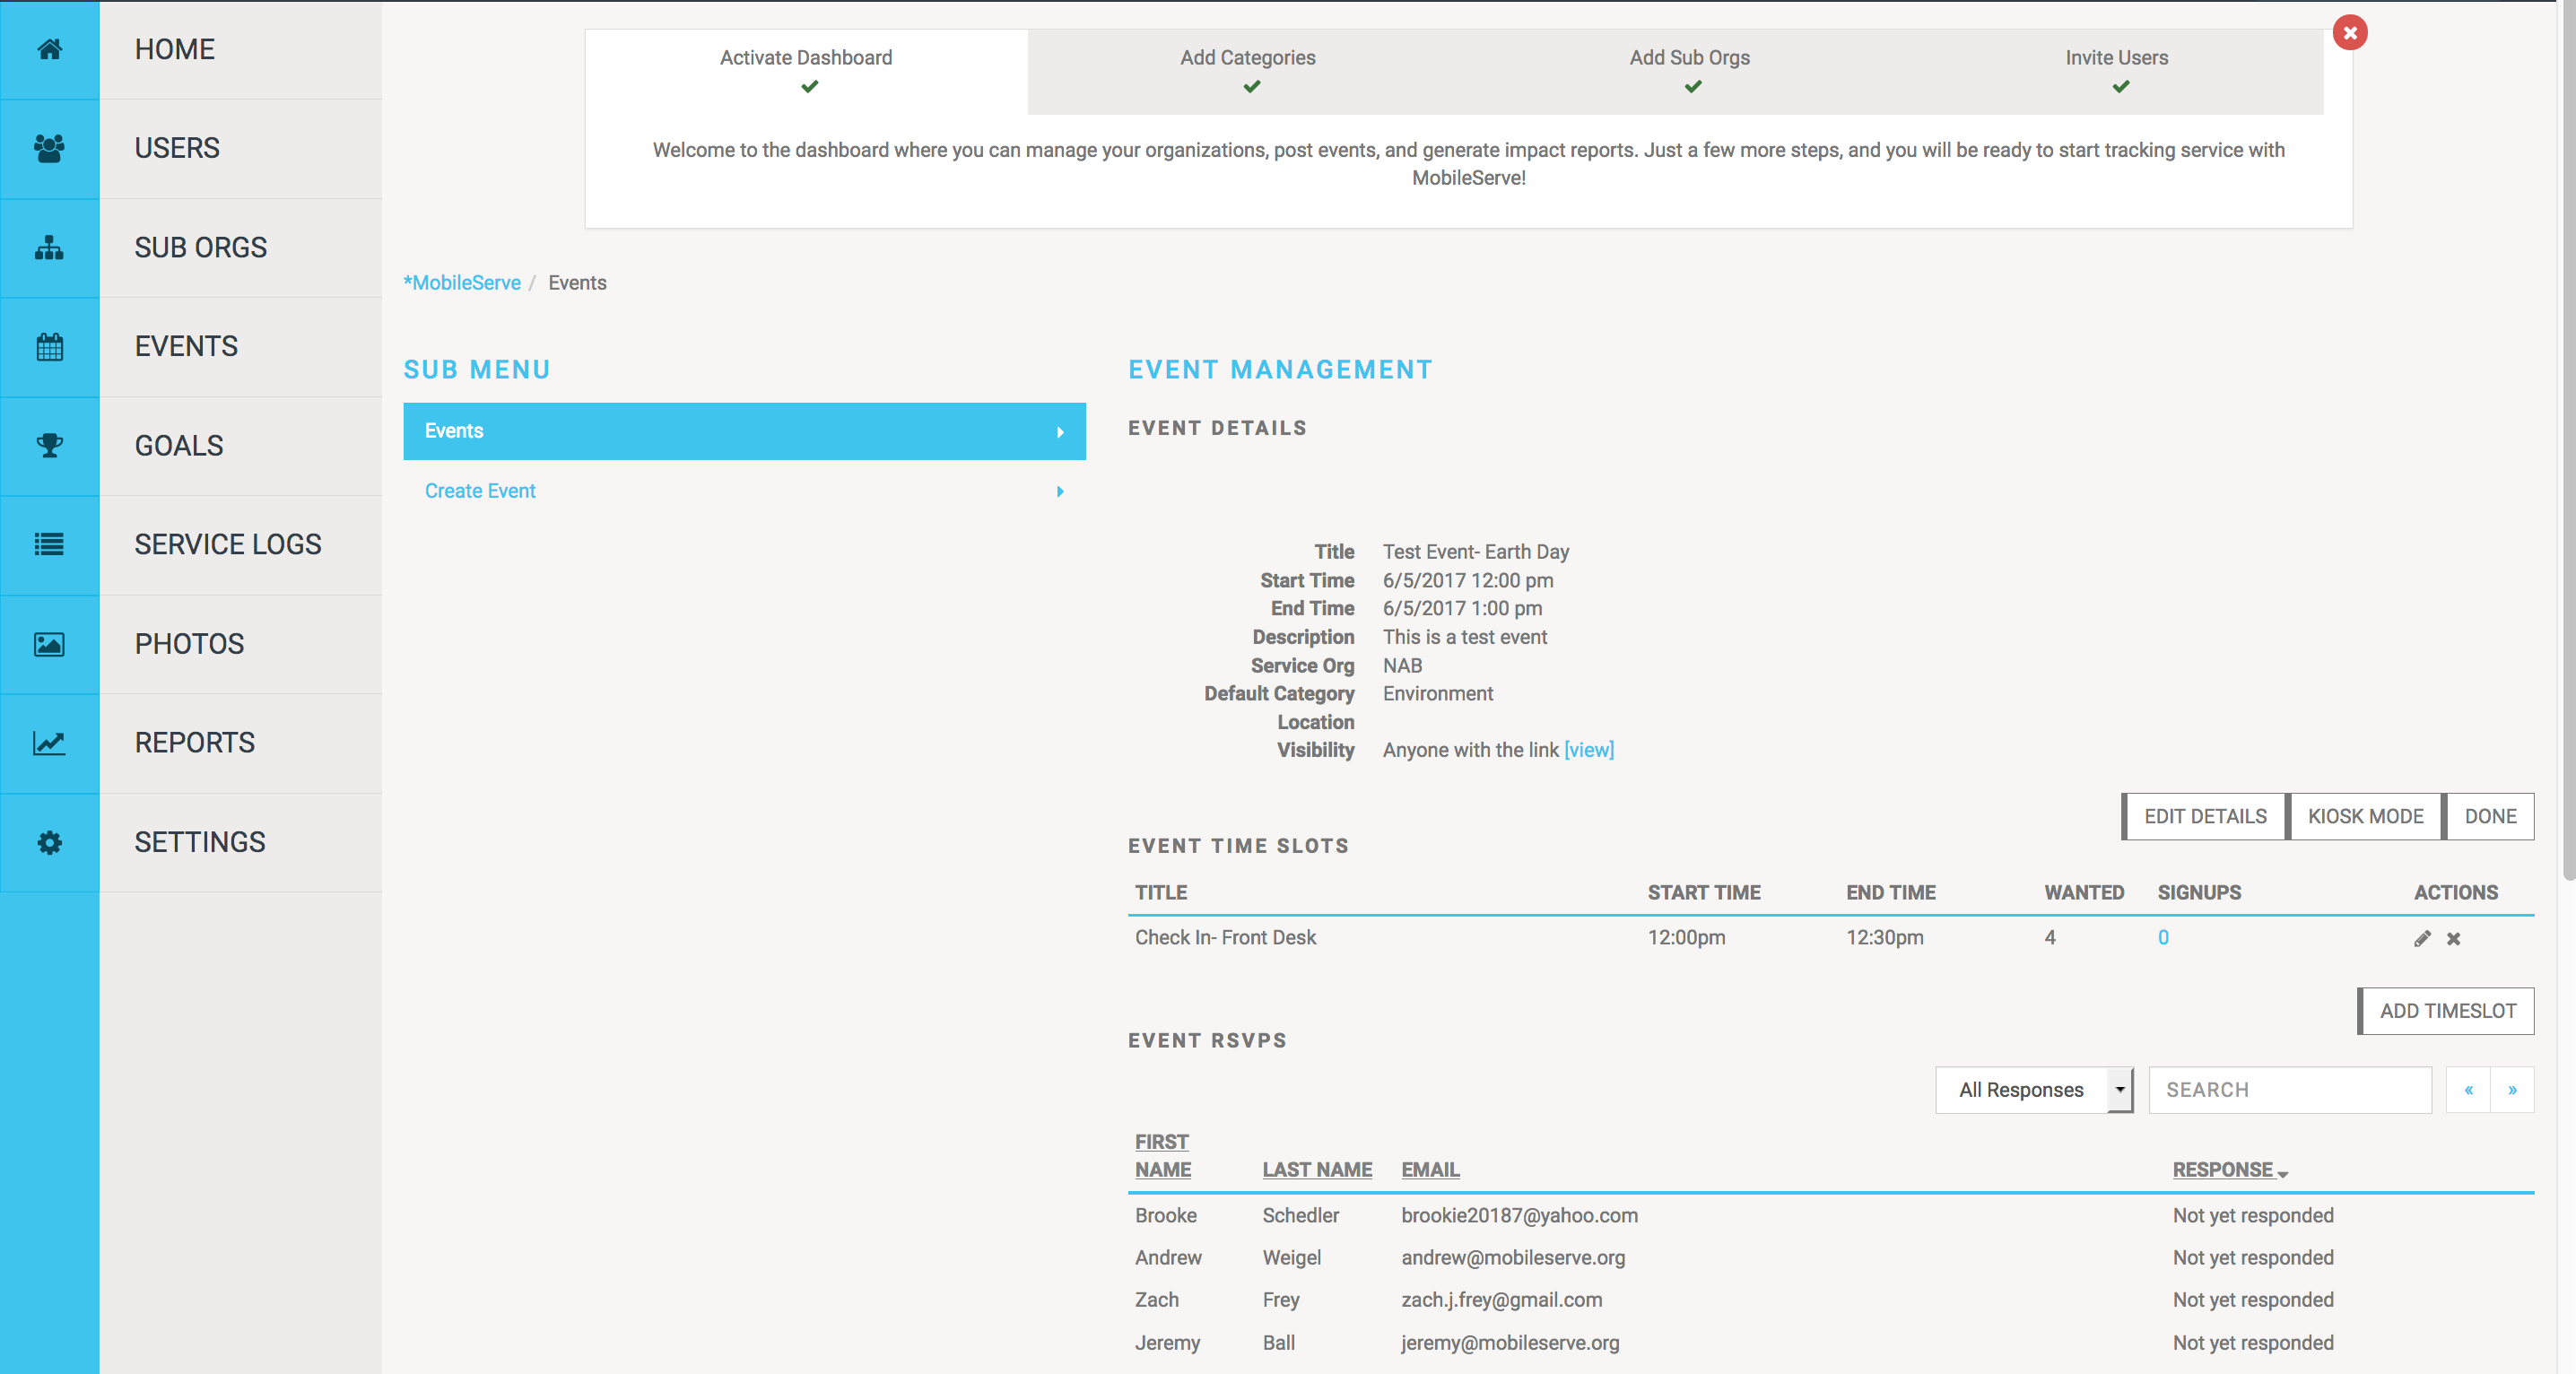
Creating Timeslots
If you want to create timeslots for your event, you can do so by clicking “Add Timeslot.”
- Enter a name for the timeslot, which will help people know what they’re signing up for. For example, you can have a timeslot called “Check in.”
- After naming it, enter start and end times. Note, these are the times for the timeslot itself, not the overall event.
- Next, enter the number of volunteers you’d like for that slot and then click the checkmark to save.
- Use the same process to create as many timeslots as you need.
- Timeslots can be used for times throughout an event or for specific responsibilities, meaning that your timeslots can overlap if necessary.
- You can edit or delete timeslot details at any time using the pencil or “x” icon.
- When users sign up for timeslots, you’ll see the total number under the “Signups” column. You can click the number to see who has signed up for that specific slot.
Invite Volunteers to the Event
Next you’ll choose who to invite, without invites, your users will not be able to see or RSVP to your event:
- At the bottom of the Event page, click "Invite".
- You can invite everyone within your organization. Note: If you’re creating the event within a sub-org, selecting “invite everyone” will only include members of that sub-org.
- Or you can invite a specific sub-org or user by typing the Sub Org/user’s name in the search box.
- When the correct name appears, select it from the drop down.
- Click “Invite” to trigger the email invitations. If you do not want to send an email along with your invitations, you can uncheck the "Email Invited Users" checkbox. This is especially helpful if you are creating and inviting your users to a large number of events. Even if your users don't get an email, once you've created the invite, they will be able to see the Event under their Events > Invitations section of their profile.
Mange RSVP's and Message Users
Under Event RSVPs you’ll see a list of the people you’ve invited to your event, and whether they’re status. You can manage this list by clicking the "Responses" drop down and filter the view to only show users with certain response types.
From your filtered list of RSVP's you also have the option to send these users a message by clicking "Send Message" at the bottom of the RSVP list. Keep in mind, your message will only be sent to those you have filtered for in the RSVP list.
View or Update an Event
You can edit the details of your Event at any time. To make changes:
- Go to the Events section in the Dashboard
- Click on the event you’d like to change.
- And click the “Edit Details” button in the top right.
- Be sure to click “Save” before going back to the main menu.
Goals
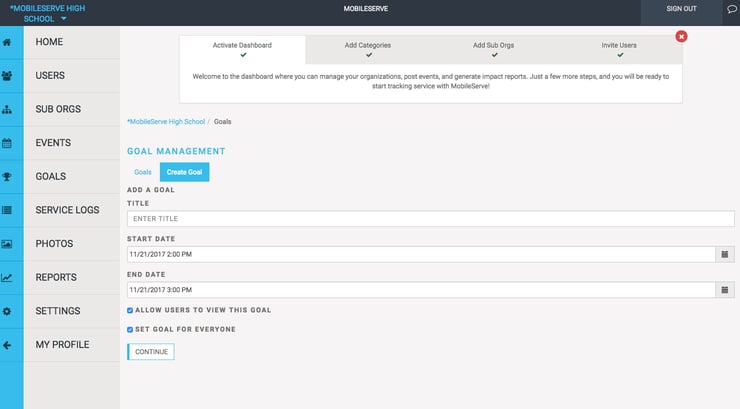
If you have opted to turn on the goals feature for your organization, you can set up goals by following these steps:
- From the admin dashboard, click GOALS
- Under GOAL MANAGEMENT, click “Create Goal”
- Enter the details of your Goal, including the Title, Start Date, and End Date.
- You have the option to make the goal invisible or visible to your members.
- If you want your members to see the Goal and their progress in their user profiles, check the box next to ALLOW USERS TO VIEW THIS GOAL.
- Next, you’ll determine which members to apply the goal to.
- You can set the goal for everyone, by checking the box next to that option.
- Or, you can enter a specific user or sub-org name.
- Click CONTINUE after making your selection.
- Next, you have the option to tie the goal to a specific service category. Or, you can choose Total Hours, if the goal isn’t category-specific.
- Enter your goal total and click the “plus sign” to the right of that field to Save.
- If you want to create a goal for most people in your organization, but you have an exception for a specific user or sub-org, you can use the Override function.
- Click Override then Create New Override.
- Enter the specific user or suborg’s name to exclude them. Click “Create” to create the override for this user or suborg
- Click “Save” to save this goal,this will return you to the “goal management” page, where you can view all the goals you have created within your organization.
- You can create as many goals as you need
- To see an overview of a specific goal, click “Goal Overview” and you will see a leaderboard list of users for whom that goal is set, as well as their progress on said goal and even export the information into a spreadsheet.
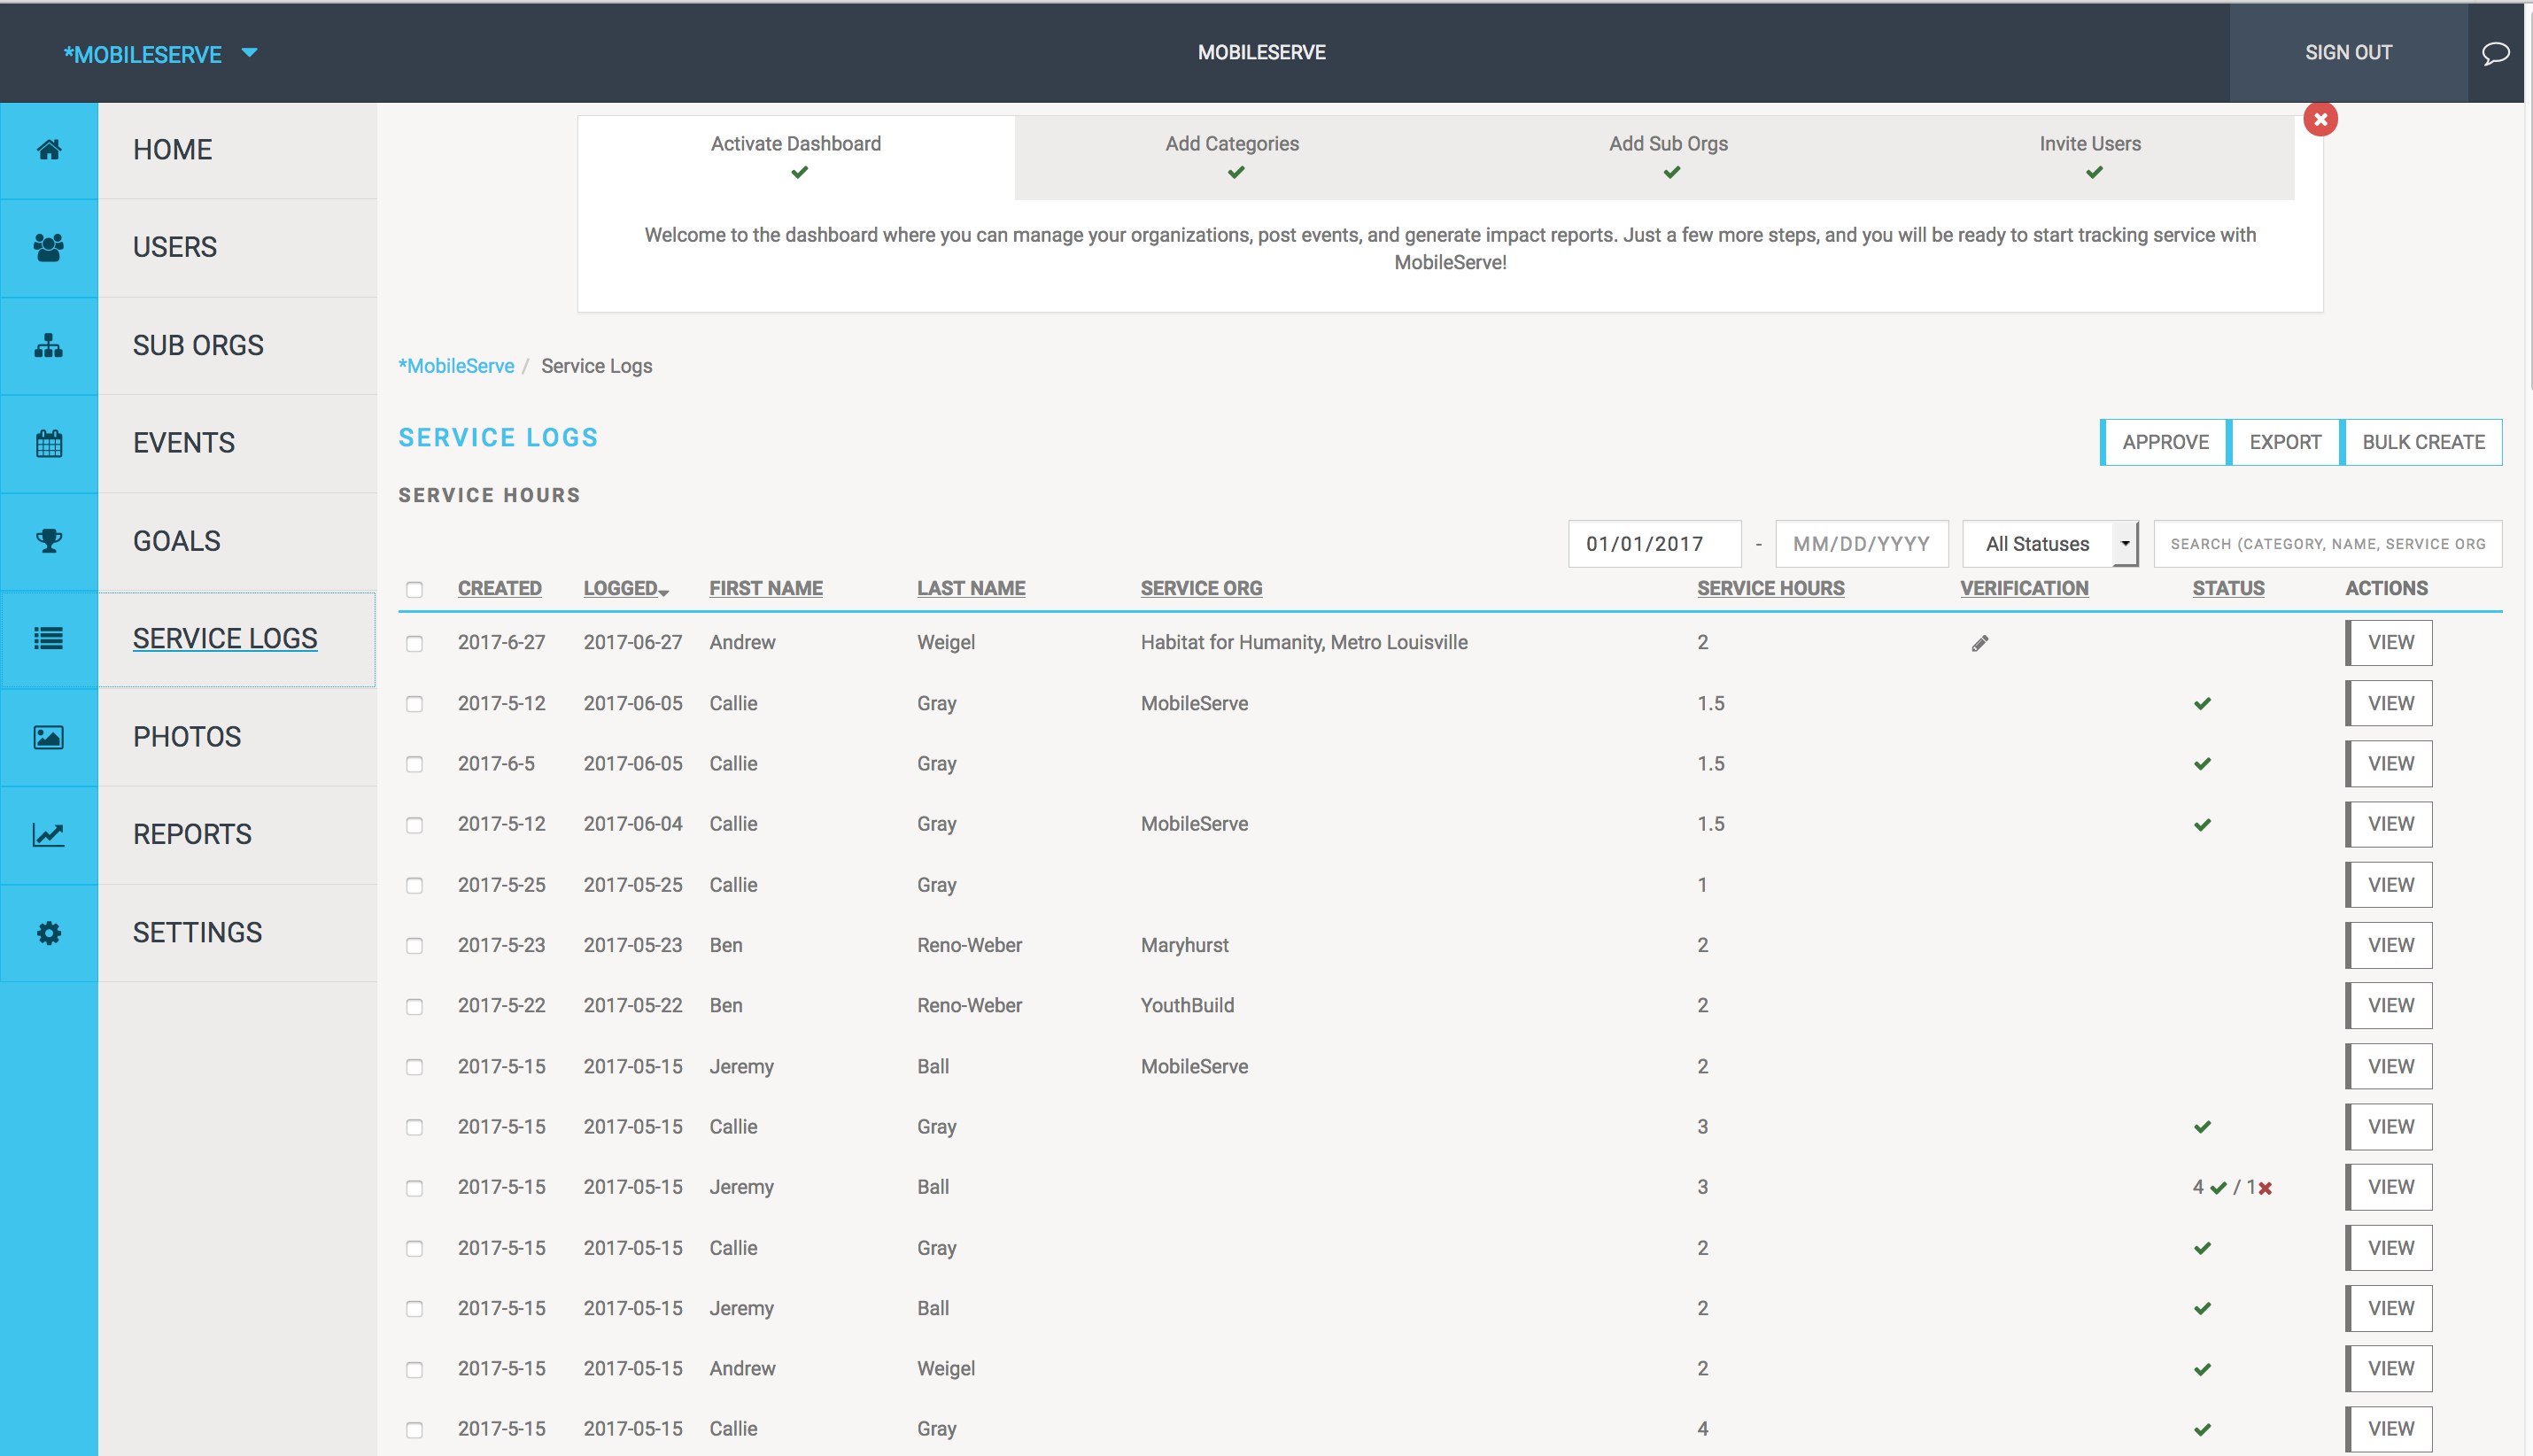
Service Logs
The Service Logs section shows every log that has been submitted, whether it was verified and how it was verified, and whether you have approved or rejected it.
To see details of a Service Log:
- Click anywhere on the row for the log you want to view and a side panel will pop up with the log details.
- Filter by date to limit the results to a certain timeframe.
- Search for a user, category, or service organization to isolate specific logs.
- Sort by Status to easily see which logs you've approved, rejected, or are awaiting your approval.
Approve or Reject a Service Log
The Service Logs section shows the status of every log. To review the log for approval:
- Click on the row of a log to preview its details.
- Check the box next to the category you’re reviewing.
- Select the “Actions” button. Select “Approve” or “Reject” in the dropdown.
- If you Approve the log, a check mark will appear in the log.
- If you Reject the log, a box will appear, giving you the option to explain why you’re rejecting the log (you are not required to comment).The user will receive an email with a link to the log and the explanation.
- The user can edit their log and resubmit it for approval again.
Add Logs on Behalf of Members (Bulk Create)
Admins can create logs on behalf of an individual, a group, or the entire organization. This feature is useful when all members participate in a single event or when adding past hours. From the Service Logs page:
- Click the “Bulk Create” button in the top right.
- Enter the service date
- The Duration of the event
- Select a service category
- Enter the service organization
- Enter a description, if you’d like
- The supervisor information is also optional
- Next, you’ll choose who you want to include in the Bulk Create action.
- If it’s everyone in your organization, click the “Create for Everyone” box and then click Bulk Create.
- You’ll receive a message asking you to confirm. Click Yes to continue or Cancel to go back.
- If you don’t want to create the log for everyone, leave the box unchecked. Instead, go to the Search bar and type the name of the user. The system will return matches based on name and email address. When you see the results, click on the correct user.
- Repeat this process for each user that should be included. You can remove a user by hovering over the box with their name, and clicking the X in the top right corner.
- You can also search for sub-orgs. Type the name of the sub-org, and select the correct ones.
- After you’ve selected the users, click the Bulk Create button.
- You’ll receive a message asking you to confirm. Click Yes to continue or Cancel to go back.
All service logs created through the Bulk Create feature, will automatically receive Admin Approval, since only an admin can create them.
Export Service Logs
Admins can export service log data to a CSV file. The file is emailed to you (it’s sent to the email address associated with your MobileServe profile). From the Service Logs page:
- To export only some logs, check the box next to those logs and select the “Export” button in the top right.
- To export all logs, select the top checkbox on the left hand side of the Service Log table to Select All, then select the “Export” button in the top right and confirm you want to export all logs.
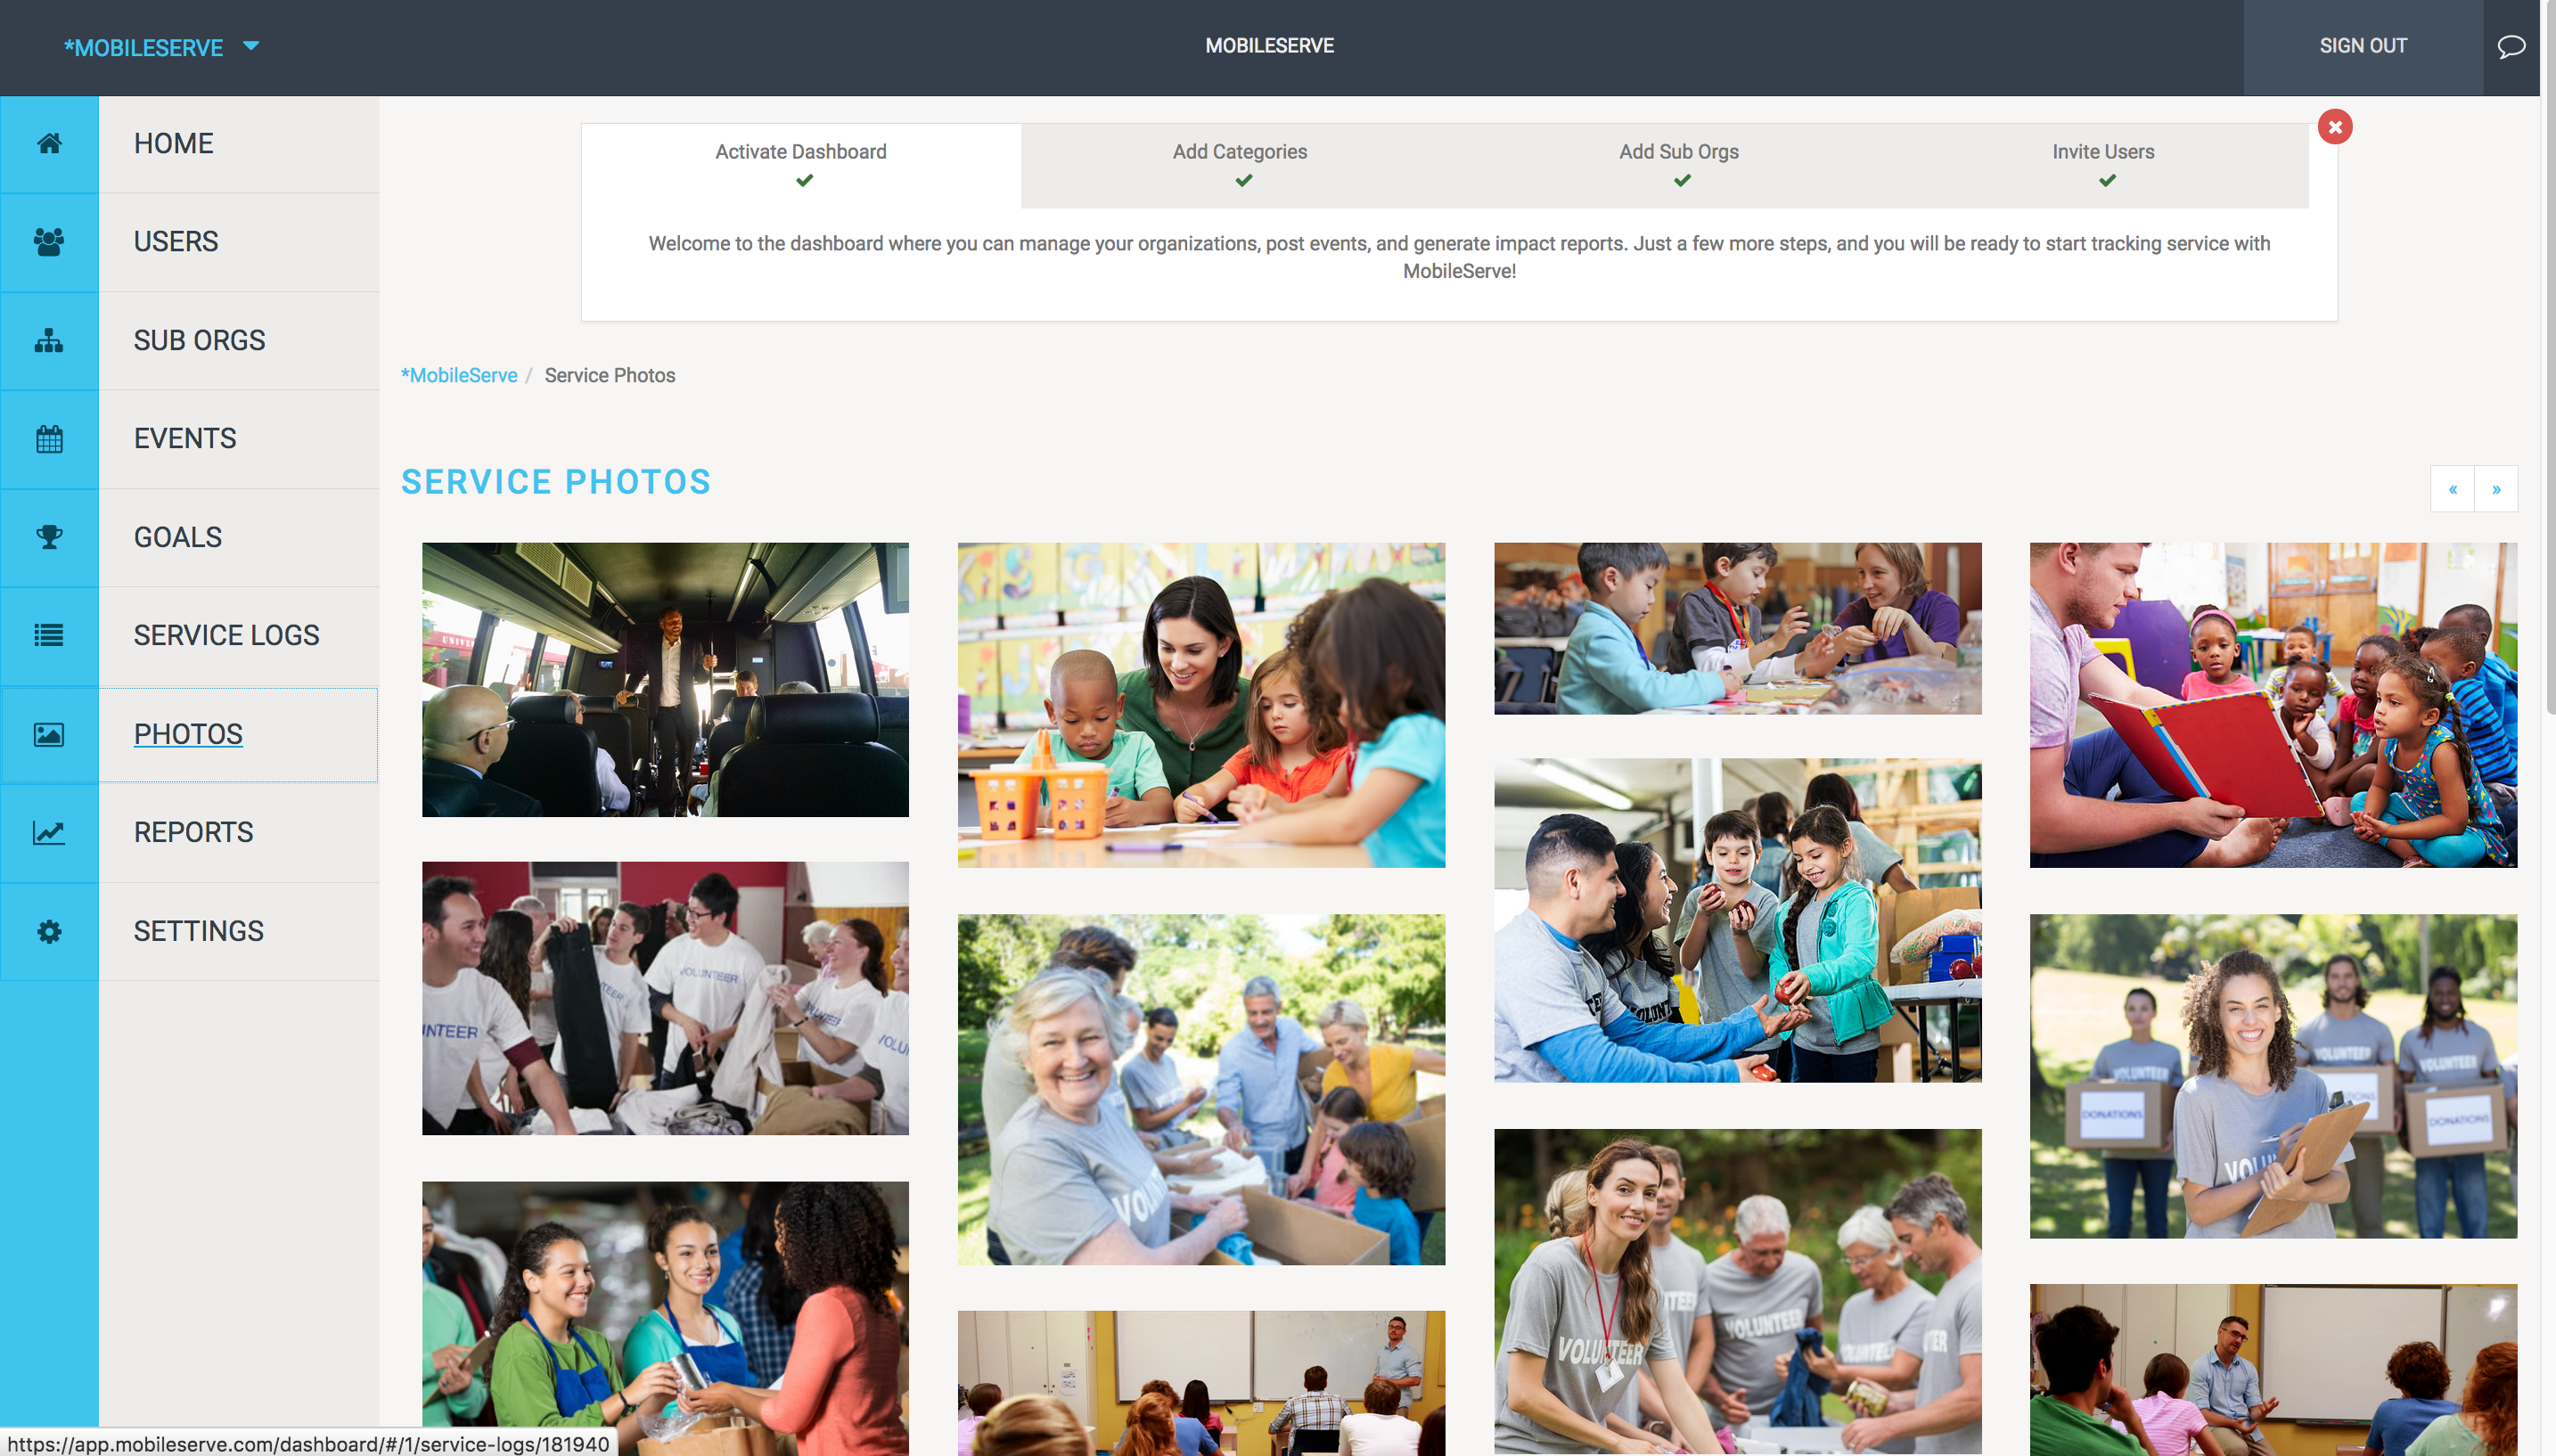
Photos
Users can include photos when logging their volunteer time, and they have the option to push them to their social media channels. All photos taken by your members will appear in your Dashboard in the Photos section, regardless of whether the member posted it elsewhere. Clicking on any photo will take you to the service log it is attached to, so you can easily read the story behind the image.
Reports
The Reports section of your Dashboard lets you download individual infographics or combine them for a custom report. You can download data as an Infographics (.png file) or the data behind the information as a csv. Keep in mind that reports are great for visualizations. To get more detailed raw data, you may want to consider doing an export from your Users (summary) or Service Logs (details) page.
Download Individual Infographics or Data Set
- Under Full Report, click on one of the options.
- Click “Download" and select the file type.
- Click on the option header again to remove it.
Download Multiple Infographics or Data Sets:
- Under Full Report, click all the data points you want to include.
- The report is built in real-time, so you can see what it looks like to add or remove the data points.
- Click “Download" and select the file type.

Settings
Your Settings page shows your Organization name and Service Categories.
Service Logs
This section allows you to customize the process for your users when they log hours. From this page you can add prompt text, edit the visibility of various fields, and set up auto-approval.
Set Field Visibility
- To manage the details on the Service Log creation process you can choose between Hidden, Visible and Required.
- Hidden makes the field invisible to your users when they log hours. They will not even see the option to fill in these details.
- Visible is the default value for all fields, it simply means this field is an option for your users.
- Required means that a user MUST enter a value in this section to submit their hours. Keep in mind that making a Signature required will only be enforced if the user is logging hours on a Mobile device, since signatures can't be captured on a computer.
Set up a Prompt
If you would prefer a more detailed question or prompt for your users to see when they log hours, you can set this up by typing your prompt into the text field titled "Prompt". If there is nothing in the Prompt text field, nothing will show up for your users. In most cases, if you have set up a prompt, you'll want to set the "Description" field as "Hidden" so that your users don't get confused by having both fields.
Auto Approval
Auto approval allows you to automatically provide approval for logs with certain types of verification.
- "Never" is the default value, and this means that the only way to approve hours is to have an admin approve them from the Service Logs page.
- "Immediately" means that all logs, regardless of verification will be automatically approved upon submission.
- "Any" means that if any single method that you have chosen is present on a log, then the log will be approved.
- "All" mean that if every methods you have selected is present, then the log with be approved.
Add / Modify Service Categories
You can add service categories, turn categories on and off, and remove categories. From the Settings page:
- To add a category, type the name into the blank box and hit the “+” incon.
- To change the name of a service category, select the pencil icon next to the name. Enter the new name & hit enter
- To change the visibility of an existing service category, check or uncheck the “Visible” box. Note: If a category is invisible, users cannot use it in future logs. Any past logs assigned to that category will continue to show up in that category in your reports.
- To delete a category, select the trash icon next to the name.If there are hours in that category, you will receive a message asking you to reassign them to a different category.
- Note: If you deleted a category, it will not show up in any reports.
User Attributes
User attributes allow you to manage the data you have for your users. We have 5 global attributes that are available for all users, and you can add additional "Custom" attributes that are specific to your organization. For each Attribute there are 4 possible settings:
- Visible: This means that users can see this field and their response on their profile under their Settings page.
- Editable: A user has the ability to edit the value once they have initially set it. If you do not make an attribute editable, but it is visible, they will be able to see the value, but not change it.
- Required: This means that in order for a user to join your organization they MUST provide this value. When they enter the Org Code to join you, any required attributes will automatically be displayed and without a response, the user will not be able to join your org.
- Searchable: Making an attribute searchable adds it to the columns on your Users page and makes the values searchable.
You can edit the settings on Attributes at any time, but keep in mind that deleting an attribute will remove all the values associated with it. You also have the ability to bulk import attribute values rather than having your users provide these for you. You can do this by selecting "Bulk Import User Attributes" under your settings.